Green screening permits even the littlest video makers to make stunning substance with amazing impacts. In any case, green screening can be testing – fail to understand the situation, and you can blow it with your customer. Regardless of whether you can spare a terrible chroma key shoot, it might take long stretches of baffling work to fix your last item.
There are a couple of things you have to know before you endeavor to set up your very own green screen studio or take green screening on area. Gustav Wilde of Cogito Creative addressed individuals from the Atlanta Internet Video Marketing Association on the most proficient method to set up an expert green screen. Here are his 6 top tips for video makers:
Green Screen Tip #1: It’s All About the Lighting
Appropriate lighting is completely vital with regards to accomplishing an expert look. The most significant thing about green screening is the lighting, you should have legitimate lighting to make the green decent and smooth. You must have one shading in this way, when you pick that shading, you don’t need to do multiple chroma keys – you can simply pick one spot on there and that entire foundation is simply going to vanish. Your editors are going to thank you, and you’ll get the last item a great deal sooner.
While you may think a costly camera or the correct programming is similarly as significant, even the best camera and altering program won’t fix terrible lighting. The lighting must be even with the goal that the foundation is all a similar shading. At the point when your lighting is delicate and even, it’s a lot simpler to utilize pretty much any product, including I-Movie, to evacuate the foundation and have it turned out to be straightforward.
Foundation Lights, Key Lights, and Fill Lights
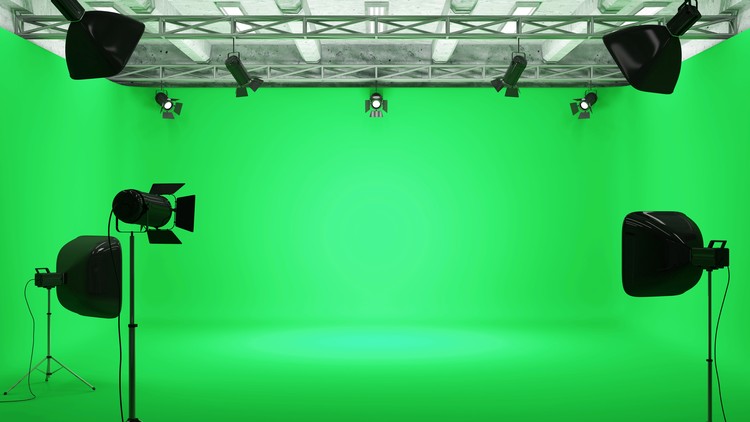
Gustav utilizes five to six lights to set up a green screen on area. A few lights are utilized to light the foundation. He prompts lighting the foundation first and ensuring the light is uniformly dispersed. When the foundation is correct, he starts lighting the on-screen character. The initial step is including a backdrop illumination. The backdrop illumination is utilized to light the entertainer from behind. It’s set overhead sparkling down on the entertainers shoulders and hair. It’s occasionally called a hair light. The backdrop illumination is there to isolate the entertainer from the foundation. “Make sure to diffuse the backdrop illumination so it doesn’t resemble a white radiance around the individual,” Gustav exhorted.
The subsequent stage is setting up a key light – your primary light – the one which is centered around the entertainer’s face and body. The key light ought to be diffused giving a delicate and even look. The following light additionally goes on the on-screen character, and it’s what’s known as a fill light. It fills in on the contrary side of the on-screen character. The key and fill together make a little measure of difference on the face, intended to indicate more enthusiasm than even light over the face. Gustav says that you can utilize a huge diffuser like he exhibited on his key light and an umbrella on the fill light or you can utilize softboxes. “You need the lighting to be even. You don’t need light green and dim green”.
Gustav utilizes and exceedingly suggests Omni lights and Tota lights. In any case, he likewise demonstrated the group of onlookers that despite everything he keeps Home Depot painter’s lights in his reserve, just in the event that it’s a “run and weapon” kind of shoot. He says that in case you’re simply beginning now and again a financial limit, these sorts of lights will work, yet you’ll invest more energy endeavoring to get the lighting even.
Green Screen Tip #2: Choose Your Surface Wisely
Chroma key screens can be blue or green, so you would need either a green or blue foundation. Green is utilized more frequently than blue since blue eyes can really key out, looking somewhat odd. These hues are utilized in chroma keying in light of the fact that they are absent in any skin tones, regardless of the ethnicity. When you evacuate all the green or blue, the on-screen character will appear fine and dandy, as long as they aren’t sporting green or blue.
Gustav referenced a few kinds of surfaces which you can use for green screening. He says that regardless of what you use, paper, a painted divider, or texture, you are searching for a smooth appearance. A wrinkled fabric or intelligent paper won’t work. You need a smooth, even look, much the same as you need for the lighting.
Gustav’s preferred determination for green screening in a studio is a painted divider. Clearly, that won’t chip away at area. “The best one (surface) is a painted divider. Some have an inclined floor also. We use paper a great deal – it’s anything but difficult to set up on area. You can utilize material – yet it’s difficult to keep it smooth,” Gustav said.
Froth is another conceivable foundation. There are likewise little compact fabric green screens which “fly out” when you unfurl them. “Master Key” is additionally a costly, however powerful technique, which utilizes a dark material with green appearance in it. You should likewise utilize a green light to mirror the fabric. With this sort of green screening, there is a requirement for extra programming.
Green Screen Tip #3: Watch for Movement
Gustav referenced one of the greatest difficulties with green screening is that you need to ensure your entertainer doesn’t move anyone part outside of the green background. One hand signal achieving simply outside the green region can destroy your whole shoot. There truly is no real way to fix a missing hand in after generation. The main thing you can do is to conceal that shot. Gustav exhorted having your on-screen character move around before you begin shooting, ensuring there aren’t going to be motions outside the green screen background.
Green Screen Tip #4: Watch Reflections and Challenging Hair
Regardless of whether your lighting and background are extraordinary, blonde hair and meager fly away hair can be testing. The shading, yellow, is near green. In this way, keying it tends to be troublesome. Gustav says that if the on-screen character has blonde hair, you should need to utilize a fuchsia gel on your backdrop illumination, which will check the green. “It’s the contrary shading on the shading wheel”, Gustav said.
Different difficulties incorporate reflections. Watch eyeglasses and intelligent gems. Anything that shimmers or reflects will challenge key. It’s a lot simpler to look for and expel those items before you begin shooting than to manage them in after generation.
Green Screen Tip #5: Watch For Shadows
Shadows can be a major test when green screening. “You don’t need your entertainer excessively near the screen. You need to be 8 to 10 feet out from the green screen to stay away from shadows”, Gustav exhorted. In the event that you do finish up with a darker green brought about by shadows, Gustav says you may need to complete two or three diverse chroma enters so as to fix the issue.
Green Screen Tip #6: Choose The Right Software
Finished edition Pro, Adobe Illustrator, Adobe Premiere and even I-Movie would all be able to be utilized to green screen. Gustav utilizes Adobe Illustrator frequently yet when gotten some information about I-Movie, Gustav stated, “It’s astonishing”. I-Movie is a free programming on Macs. Along these lines, it’s an extraordinary method to begin.
Gustav was likewise gotten some information about what videographers ought to hope to spend when setting up a green screen studio. He said the cost can differ extraordinarily. Be that as it may, on the off chance that you need extremely proficient lighting, “It will be around $800”. Obviously, that does exclude the cost of the camera.
While setting up a studio in your home could be as basic as putting resources into paint, painter’s lights, a camera, and a program like I-Movie, Gustav exhorted that everything comes down to time versus cash. The painter’s lights are all the more testing. Yet, you can set aside a lot of effort to set them up in your studio. With regards to area green screening, you need to think about your time in each shoot. You absolutely wouldn’t have any desire to take three hours, and you would prefer not to invest extra energy revising every one of the issues in post production.
So, with these tips and a little trial and error, you can start green screening right away. Just remember, invest either time or money in getting the proper lighting and the proper background. These two elements are the “keys” to great “keying”.